Use Power Automate Desktop to start/stop Azure VMs
By Anshul
- 3 minutes read - 519 wordsHello All! I am sure you must have heard about Power Automate by now, being it a talk of the town in the Microsoft world recently. For those who haven’t,
Power Automate, formerly known as Microsoft Flow, provides a Cloud-based automation platform to configure repetitive tasks as workflows and trigger them on an event basis or on a schedule. Platform already has more than 400+ pre-built connectors to allow the Citizen users to connect to various Cloud-based as well as On-premises resources.
OK. That was about Power Automate ( the cloud version). Recently Microsoft announced a downloadable version of the platform for Windows 10 and Windows Server users. You can get the application here .
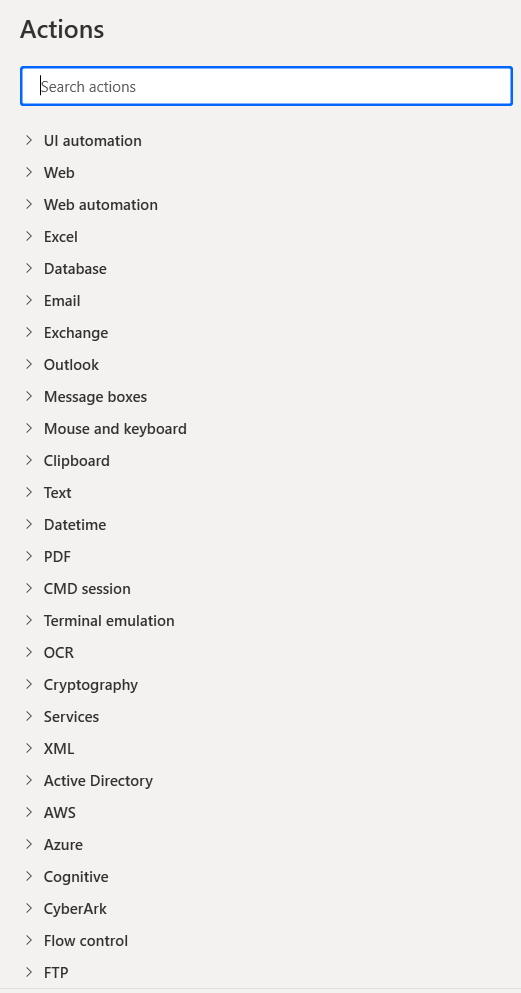
This application runs locally and create Desktop-version of flows for you to run in your computer only. That being said, Microsoft also included some cloud-based connectors too to quickly manage Azure/AWS resources right from the application. Below is the screenshot of the actions/connectors available in the desktop application as of now-
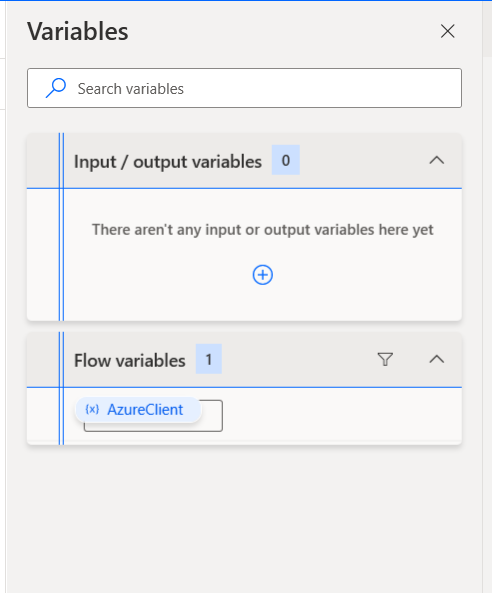
Similar to the Cloud-based version, Power Automate Desktop also allows you to create variables and use them in your workflows -
With that cleared out, ,let’s quickly see how we can control our Azure VMs right from the desktop Application with the help of a Flow.
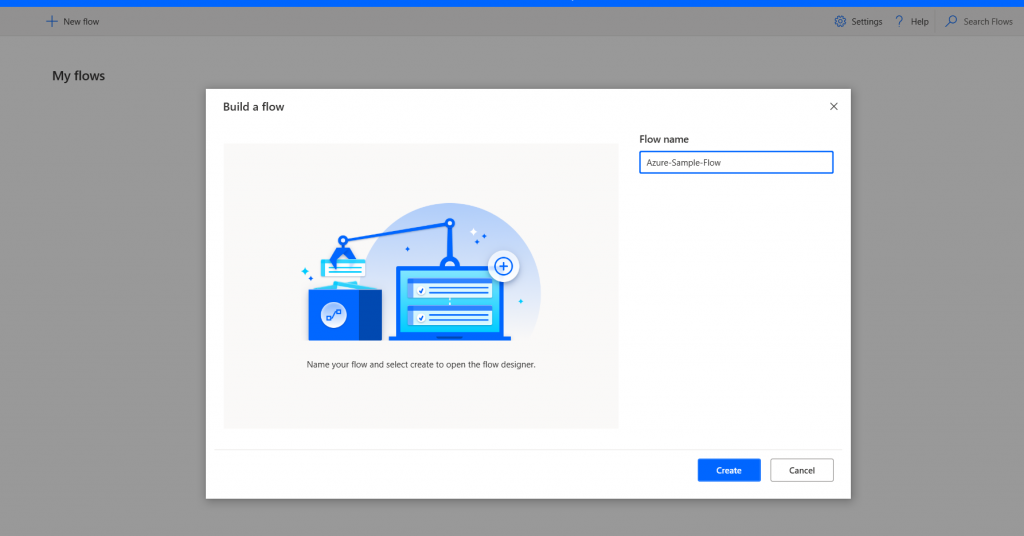
- Create a new flow
Note: You cannot create a scheduled flow from Power Automate desktop. All flows need to be run manually from inside the app.
2. Give the flow a name. Then scroll down in the Actions pane in the left. Expand Azure and drag Create Session to the canvas in the middle. This action will pop up a window for you to fill up the parameters. This action creates a connection to your Azure subscription using a Service principal. You can either fill up the details manually or use a file.

%SubID% - Input variable with the value of Subscription ID created beforehand. Variable name- SubID
3. Create your workflow by dragging another action Start virtual machine from under Virtual Machines and populate the required fields-
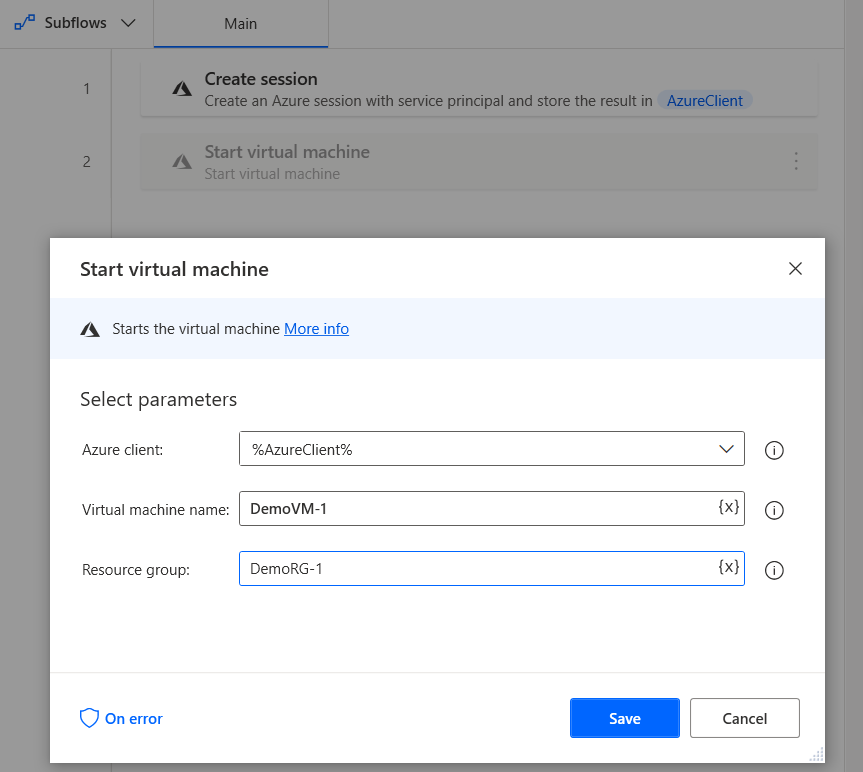
And that’s it! You can also parameterize the VM name. Another cool feature available, is regarding the Exception Handling. The connector comes with pre-defined exceptions and you can create rules in case any of those exceptions occur. To set this, you need to click on On Error at the bottom-left and then expand the Advanced section.

Once you are done, save the Flow and you are good to go! Now you can start your Azure VM from inside the desktop application.
Current Limitations
- You do not get to see the History runs of the flow as of now with a personal account.
- You cannot schedule the Desktop flows.
- You cannot trigger Desktop flows from Cloud (flow.microsoft.com) to run on Windows 10 devices.
- Sharing and Collaboration is limited to Organization Premium account.
- & few more…..
As the product is still in its early stages, we see that there are many opportunities for improvements. Hope Microsoft continues to invest and improve this really helpful no-code automation solution. You can learn more about the platform and its capabilities from here and here.