Azure Automanage -Quicker way to implement best practices
By Anshul
- 4 minutes read - 754 wordsHello Everyone! So today we will be looking into a new Azure service known as Azure Automanage which is in preview state as of today.
What is Azure Automanage?
Azure Automanage is a service which helps by removing the manual effort required in configuring some best practices in terms of reliability, security and better management of your virtual machines. It takes care of all that configuration by itself. All you need to do is enable your VM for Automanage service.
Basic Idea
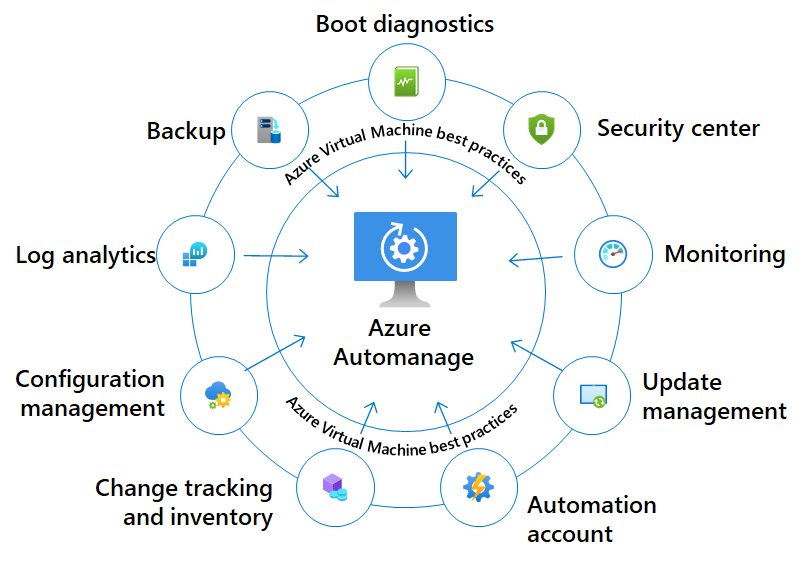
So Azure Automanage has integrations with multiple services like Backup, Log Analytics, Configuration Management, Update Management, Security Center etc. All the VMs that you onboard to this service, will be configured to be monitored and controlled by the mentioned services. These services will provide the automated implementation of the best practices that Microsoft recommends when using these services. Once configured, Automanage service will also continuously look for any drift from the configured settings and will automate the remediation of the drift.
How to go about enabling it?
Well, there are many ways in which you can enable Automanage service for your VMs. You can directly go to the service overview page and look for the VMs in your subscription to enable it on.
Apart from this, you can enable Automanage using Azure Policy with DeployIfNotExists affect. This policy will ensure that all the VMs that you deploy in your subscription are automatically onboarded to this service and in turn managed by the services we saw above. You can directly access the policy from here in Azure portal.
Another method you can use is ARM templates, while deploying your VMs using a configurationProfileAssignment object in the template.
{
    "$schema": "https://schema.management.azure.com/schemas/2019-04-01/deploymentTemplate.json#",
    "contentVersion": "1.0.0.0",
    "parameters": {
        "machineName": {
            "type": "String"
        },
        "automanageAccountName": {
            "type": "String"
        },
        "configurationProfileAssignment": {
            "type": "String"
        }
    },
    "resources": [
        {
            "type": "Microsoft.Compute/virtualMachines/providers/configurationProfileAssignments",
            "apiVersion": "2020-06-30-preview",
            "name": "[concat(parameters('machineName'), '/Microsoft.Automanage/', 'default')]",
            "properties": {
                "configurationProfile": "[parameters('configurationProfileAssignment')]",
                "accountId": "[concat(resourceGroup().id, '/providers/Microsoft.Automanage/accounts/', parameters('automanageAccountName'))]"
            }
        }
    ]
}
Categorize the implementation between Environments
Azure Automanage supports two environments - Dev/Test and Production. As the names imply, these environments support different configurations. Like in Dev/Test, you wouldn’t get the backup service enabled for your VMs.
Below is the list of all the services you get in Dev/Test Environment -
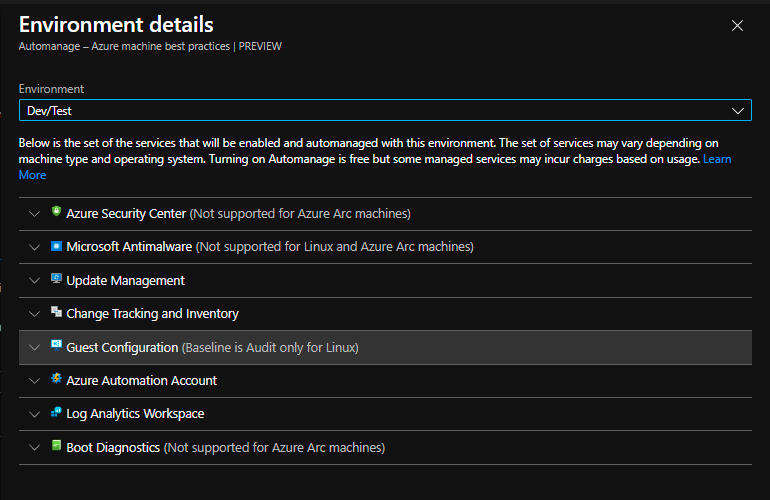
For Production, you get all the service shown above along with Backup and Machine Insights Monitoring services for extra protection and monitoring of your production VMs.
Configuration Preferences
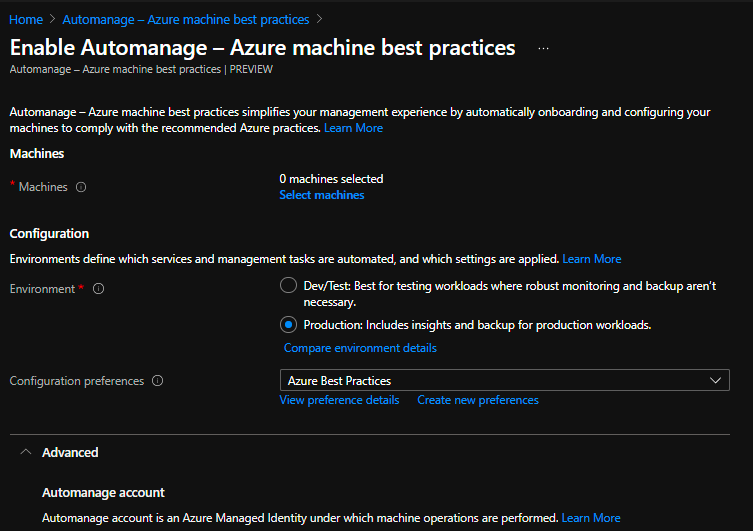
As of now, not all the supported services we have seen allow manual configurations. You can configure your preferences manually only for Backup Service (in Production environment only) and for Microsoft Antimalware solution. You get a default configuration named ‘Azure Best Practices’ when you go for enabling it for VMs. But you can also create a custom one with your preferred settings and save it in your subscription for its use within the subscription.
For Backup service, you can define the frequency of backups and also the retention period. For Microsoft Antimalware solution, you can customize which files, processes and extensions you want to exclude along with the time period of the scan.
Automanage Account
The Automanage account is the identity that is used by the Automanage service to perform its automated operations.
In the Azure portal experience, when you are enabling Automanage on your VMs, there is an Advanced dropdown on the Enable Azure VM best practice blade that allows you to assign or manually create the Automanage Account.
The Automanage Account will be granted both Contributor and Resource Policy Contributor roles to the subscription(s) containing the machine(s) you onboard to Automanage. You may use the same Automanage Account on machines across multiple subscriptions, which will grant that Automanage Account Contributor and Resource Policy Contributor permissions on all subscriptions.
You can create this Automanage account from Azure portal or you can use ARM template as well.
Things to Note
- Service is supported in only few regions and OS versions for now.
- You need Owner role or Contributor + User Access Administrator roles on the subscription containing your VMs.
- Some of the Participating services do not manage and control Azure Arc-enabled machines.
- Once you disable any VM from the service, it does not remove the monitoring or the control participating services have on your VM. You will be continued to bill for those services unless explicitly removed. Disable option only stops the continuous monitoring Automanage service provides from the drift.
So that’s it! Hope you found this quick overview of Azure Automanage service helpful. You can read more about it from here.