Best Practices for Storage Accounts in Azure
By Anshul
- 10 minutes read - 1954 wordsHello everyone, this post is going to be of huge help for you if you are using Storage Accounts in Microsoft Azure. If you want to learn about Storage Account and how to create one, click here.
Overview
Storage Account is a very common service in Azure which almost every Microsoft’s Cloud customer uses. The steps to create and get started with this service are very straight forward. You create one of these accounts and you are good to go with your online, readily available data storage solution. The solution is very flexible in terms of tiers you want your data to be stored in, the type of redundancy/replication you need etc. But when you have your data in Cloud, where it is available over the Internet with a simple URL, anybody can access it unless you have taken the time out to consider about the security practices for your storage solutions. It is very crucial to safegaurd your data sitting in Cloud to prevent you and your organization from security breaches, which nowadays are becoming pretty common. Hence, to save you from those risks and to optimize your Storage Account setup, I have compiled a list of some of the best practices in terms of deploying and using your Storage Account resource in Azure.
Best Practices
Improve Availability and Caching with Snapshots
Blob snapshots increase the availability of Azure storage by caching the data. Snapshots allow you to have a backup copy of the blob without paying extra. You can increase the availability of the entire system by creating several snapshots of the same blob and serving them to customers. Assign snapshots as the default blob for reading operations and leave the original blob for writing.Your account does not incur additional charges for snapshots associated with a blob until you update the blob on which they are based. Once you update the base blob, it diverges from its snapshots, and you will be charged for the unique blocks or pages in each blob or snapshot.
Configure Diagnostic settings for Storage Account
Diagnostic logs of a storage account must be sent to either an archiving solution like another Storage Account or a monitoring solution like a Logi Analytics workspace. Former helps in retrieving and auditing the historical logs while latter helps in setting up alerting solutions in case of anamolies in the performance or availability of the storage account.
Connectivity with Virtual Network
If you need your applications to have a secure connection from inside a Vnet to your storage account, you can define certain restrictions to tighten the controls. Some of those restrictions are-
1. Use Virtual Network Service Endpiont.
And use Service endpoint policies on top of it to restrict the access to specific Storage Account and not to all of them in a region/subscription/resource group scope. Read more here
2. Or you can use Private Endpoint
To secure the traffic even further using Private IPs instead of Public ones. In this case, the traffic does not flow through Public internet and goes through Microsoft’s backbone network instead. A private endpoint is mapped to an instance of a PaaS resource instead of the entire service. You can only connect to the specific storage account. Access to any other resource in the service is blocked. This mechanism provides protection against data leakage risks.
3. Restrict the access from a VNet
Using VNet ACL rules instead of IP filtering which can help in reducing the exposure of your storage account via Public IPs. Disabling IP-filtering prevents Public IPs to access your Storage account.
SKU restriction
Whenever a new storage account is being deployed, it should not be allowed to choose any SKU and should be restricted with the one or couple SKUs which your project/organization approves. This restriction can be implemented using Azure Policies for subscription-wide control or by using ‘allowedValues’ for SKU parameter in ARM templates during deployment. This can help in reducing unnecessary charges that may incur due to unintended replication happening by choosing a higher SKU of the storage account.
Anonymous Access
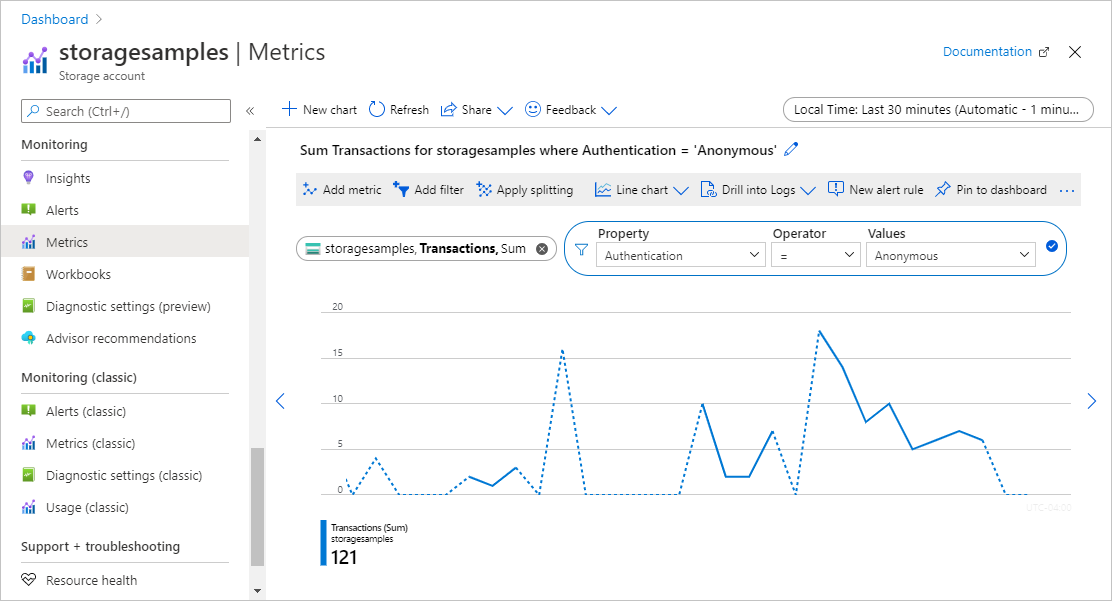
The storage account containers must never allow anonymous access. Disabling Public access on the storage account scope prevents exposing containers inside with public access. And on top of that, an alerting solution should be in place to check for any anonymous access to your containers. For that, storage account needs to have proper logging enabled. A quick check can be done on the incoming requests by going to Storage Account –> Monitoring–> Metrics blade. There you can define the metric you want to monitor (In this case it is Transactions with filter applied as shown in the picture below). This can help in preventing a serious data breach.
You can create an alert rule here to notify if x number of anonymous requests are recieved. Or you can create an alert using KQL query to look for historical Anonymous requests like this
StorageBlobLogs
| where TimeGenerated > ago(7d) and AuthenticationType == "Anonymous"
| project TimeGenerated, AccountName, AuthenticationType, Uri
For this to work, you need to have diagnostic logs setting enabled for your storage account and configured to send logs to a Log Analytics workspace.
You can use the query below in Resource Graph Explorer to find all the storage accounts in which Public Access is enabled
resources
| where type =~ 'Microsoft.Storage/storageAccounts'
| extend allowBlobPublicAccess = parse_json(properties).allowBlobPublicAccess
| project subscriptionId, resourceGroup, name, allowBlobPublicAccess
Enable Access to the Storage Account
Following methods should be followed to allow access to the data stored in the Storage Account:
1. Use AAD-based access whenever possible
For example, if you want a user to only able to read the data from the storage account, you can assign Storage Blob Data Reader role to it. You can assign Storage Account Key Operator Service Role to somebody who should be responsible for only taking care of regeneration of Access Keys. You can find more such roles here
2. Use SAS tokens instead of Access Keys
Access keys are very powerful allowing the complete access to the storage account. And therefore it becomes extremely crucial to make sure the keys are stored somewhere securely. On top of that, there should be a regulated mechanism to keep rotating the keys in case either of them get exposed. In order to avoid this level of exposure, you should SAS tokens. These tokens are like temporary access keys with proper expiration time and also with specific access rights on specific storage service ( blob, file share, table or queue entities). Thus you do not expose your entire storage account to somebody who is only going to need the data from blob service. Here again, you get two keys to sign the SAS token. Hence in case of a compromise, you can change the key used for signing the SAS token and reshare with your team. Moreover, you can restrict the access using this SAS token by specifying IP addresses.

You can append this SAS token to the Blob URL to access it like this-
https://{BlobAccountURL}/{containerName}/{filename.ext}?{SASToken}
3. Use Stored Access Policies
This is by far the safest option to enable access for your storage containers. You can create Stored Access Policies for each container you want to give access to. Once the policy is created for the respective container, you can create a SAS token referencing that Access Policy. Now what happens is, this SAS token only allows the access to that specific container and for the duration you specified in the policy. Not only it gives you more granular control, it also lets you easily revoke the access by simply deleting the Access policy for that container and you are good.
Enable Soft Delete for Container/Blobs
This feature should be enabled for easy recovery of inadvertently or maliciously deleted blobs or blob snapshots. You can define the retention period between 1 and 365 days to hold the deleted blobs. This feature applies on the scope of Container as well as Blobs.
Hot vs Cold Tier vs Archive Tier
Hot Tier is used when the data access is planned to be frequent. You would want to store only that data in Hot tiered blob storage where you expect to retrieve the data multiple times a day. This tier has highest storage cost but lowest data-retrieval cost among all the tiers. Microsoft at the backend keeps your data on Standard SSD drives thus allowing lower latencies. Real-world scenarios for Hot Tier would be storing IoT logs, data used for real-time reporting and general Application data. Data in this tier is supposed to be online and available for anytime and immediate access.
Cold Tier is geenrally used when we want to access the data immediately but not frequently. To give it a number, we can consider storing that data in this tier which is supposed to be used once a month or less. Here the storing cost is lesser than that in Hot tier but retrieval cost is little higher. Data has slightly lesser availability percentage than Hot tier. Data is stored in Standard HDDs, thus increasing the latency but not much. Real-world scenario for Cold tier data storage would be storing BC/DR(Buisness Continuity & Disaster recovery) data. Such data is only used during actual failover or during restoration processes otherwise the data needs to be sitting there without being accessed. You will charged an early deletion fee if you remove the data from cold storage tier before 30 days. Meaning, we need to keep the data there for at lease 30 days.
Archive Tier is used to store the data for long period of time with no online availability for immediate access. Data needs to be stored for a minimum of 180 days in the archive tier otherwise you will be charged an early deletion fee. The data in Archive tier cannot be read or modified. In order to read the data, you need to rehydrate the blob to an Online tier ( Hot or Cool). This rehydration can take up tp 15 hours because at the backend Microsoft works on copying the data from Magnetic disks to SSD drives. Real world scenario for archiving the data would be storing Patients’ health records, Organization’s financial logs, long-term backups etc.
Lifecycle Management Policies
LMPs are the json policies you can author to define the automatic transition of blobs from one storage tier to other or even permanent deletion. These policies monitor lastAccessed or lastModified properties of blobs to implement the policies. A sample policy looks like this
{
  "rules": [
    {
      "enabled": true,
      "name": "move-to-cool",
      "type": "Lifecycle",
      "definition": {
        "actions": {
          "baseBlob": {
            "tierToCool": {
              "daysAfterModificationGreaterThan": 30
            }
          }
        },
        "filters": {
          "blobTypes": [
            "blockBlob"
          ],
          "prefixMatch": [
            "sample-container/log"
          ]
        }
      }
    }
  ]
}
Here in this policy, we are monitoring Blobs under sample-container and log directory. This is an example of granular control you can apply using LMPs. This policy looks for any blob that has not been modified in last 30 days and then moves it to Cool tier. The next policy below shows more options that includes automatic deletion, along with multi-tier movement
{
  "rules": [
    {
      "enabled": true,
      "name": "sample-rule",
      "type": "Lifecycle",
      "definition": {
        "actions": {
          "version": {
            "delete": {
              "daysAfterCreationGreaterThan": 90
            }
          },
          "baseBlob": {
            "tierToCool": {
              "daysAfterModificationGreaterThan": 30
            },
            "tierToArchive": {
              "daysAfterModificationGreaterThan": 90
            },
            "delete": {
              "daysAfterModificationGreaterThan": 2555
            }
          }
        },
        "filters": {
          "blobTypes": [
            "blockBlob"
          ],
          "prefixMatch": [
            "sample-container/blob1"
          ]
        }
      }
    }
  ]
}
You can target multiple directories in a container or different containers by defining their path in prefixMatch parameter
"definition": {
        "filters": {
          "blobTypes": [ "blockBlob" ],
          "prefixMatch": [ "sample-container/blob1", "container2/blob2" ]
        },
So that was it! Hope you found this post helpful. If you did, please do share it. Ciao!