Upgrade Authentication for your Azure Automation Runbooks
By Anshul
- 4 minutes read - 721 wordsOverview
Hello! Microsoft recently announced the general availability of support for Managed Service Identity(MSI) in Azure Automation account. This news has been widely appreciated from Microsoft Azure’s customers as it greatly reduces the pain of managing the Run-As-Account SP certificates, which has been the main authentication method for runbooks running in Automation accounts since the inception of the service.
To make the customers adapt this more-secure method, Microsoft has now removed the option to create a Run-As-Account along with the new Automation account. Now you will see the option only to create Managed Identities, either System-assigned/User-Assigned or both. Although not to panic, they still support the existing automation accounts using Run-As-Accounts.
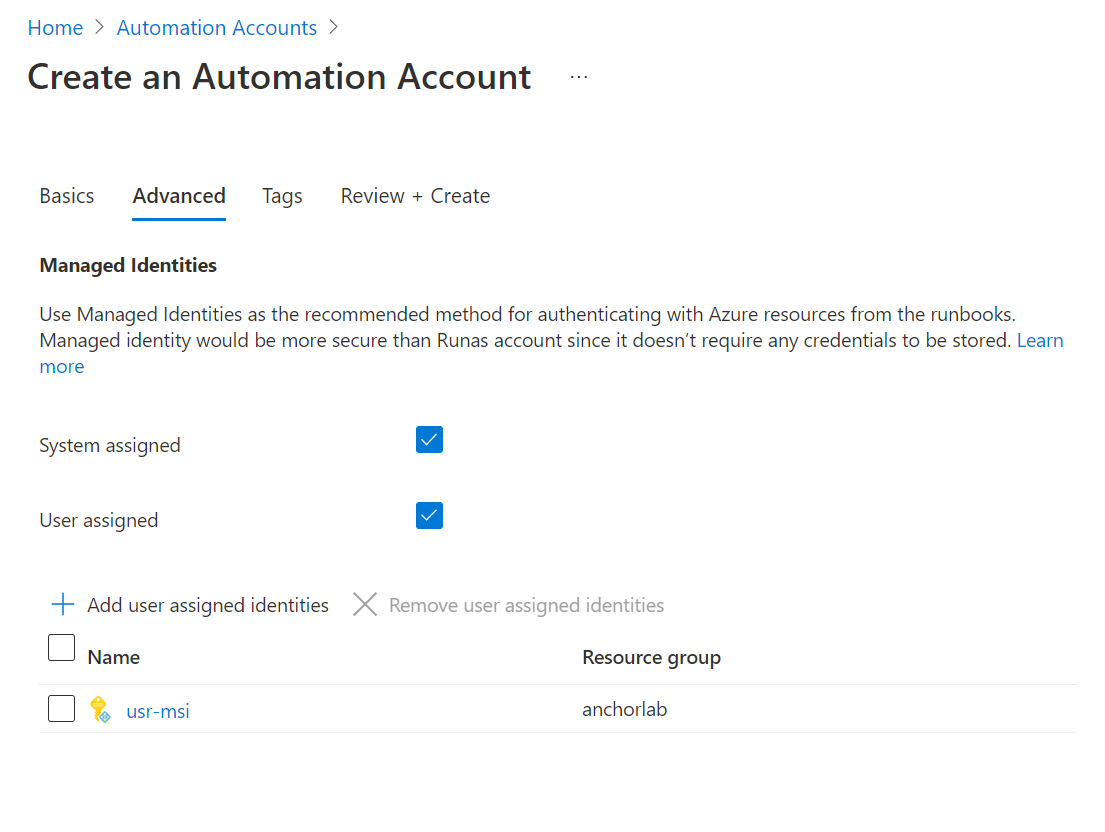
System-Assigned Managed Identities is supported for cloud as well as hybrid jobs, while User-Assigned Managed Identities is supported only for cloud jobs. Azure Automation Hybrid jobs could be running on a Hybrid runbook worker running on an Azure or non-Azure VM. A managed identity from Azure Active Directory (Azure AD) allows the runbook to easily access other Azure AD-protected resources. The identity is managed by the Azure platform and users could eliminate the management overhead associated with managing Run As Account in the runbook code.
How to Upgrade?
Now let’s see how we can upgrade our runbooks which were using Run-As-Accounts to switch to MSIs. The process is pretty simple. There is not really a list of prerequisites, but majorly you need a MSI, either System-Assigned or User-Assigned based on the planned lifecycle of these identities.Here are the steps you need to follow-
Create a Managed Identity
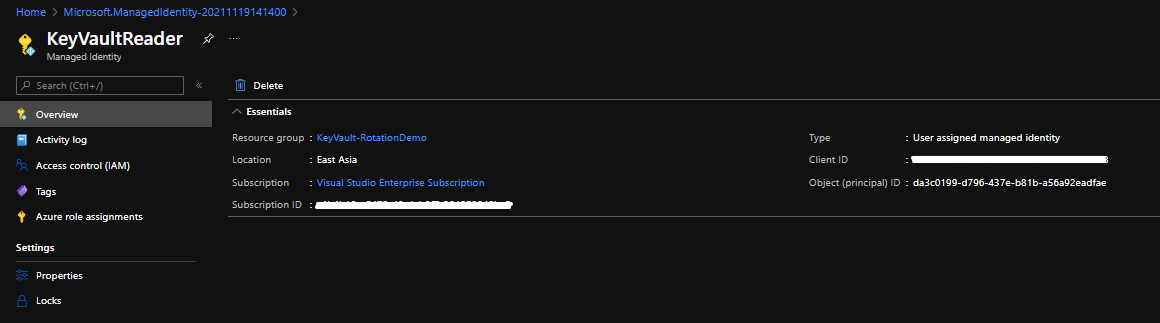
In my example, I am creating a User-Assigned managed identity, which will help me in accessing the KeyVault secrets from my runbooks. Simple scenario and very simple implementation. Let’s see how.
You go ahead, search for User-Assigned Managed Identity from top search bar and create a new User-Assigned MI resource in your preferred reosurce group.
Assign Access
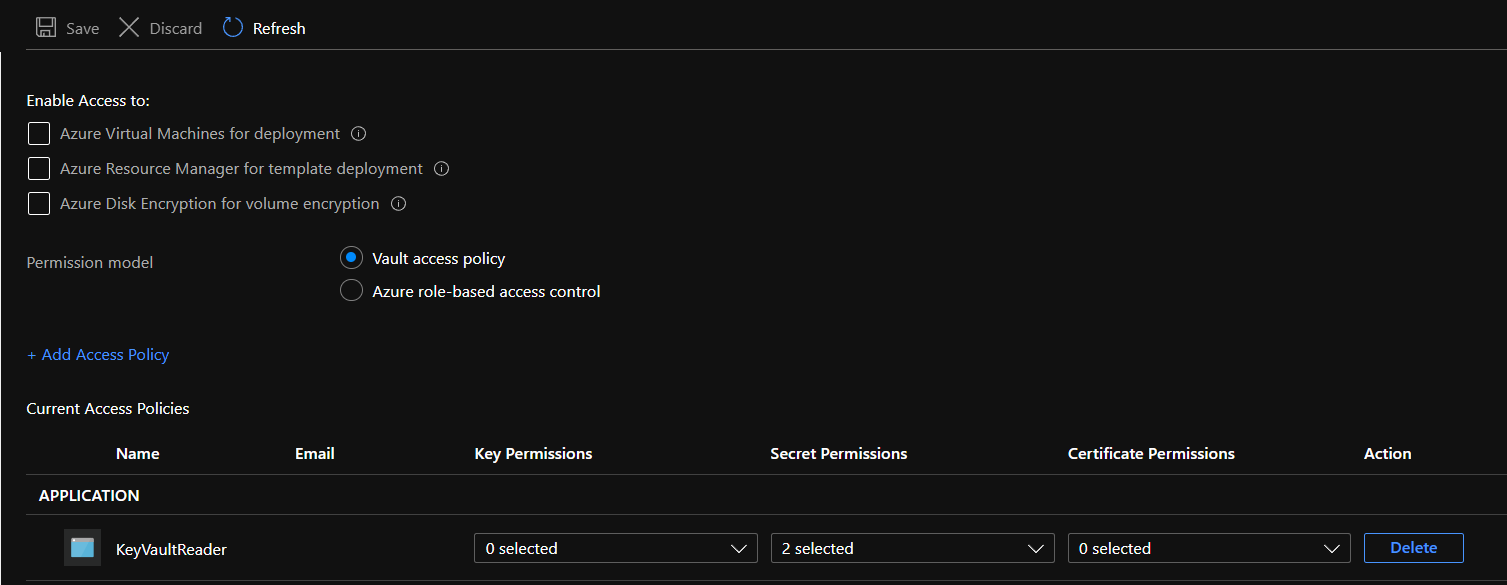
Now you need to make sure the created MI has the access to your resource which you want to call from the runbooks. In my case it is a keyvault. So I go to the Access policies section of my keyvault and add the MI with Get & List Secret permissions. Whenever you do this, make sure you follow the principle of least privilege.
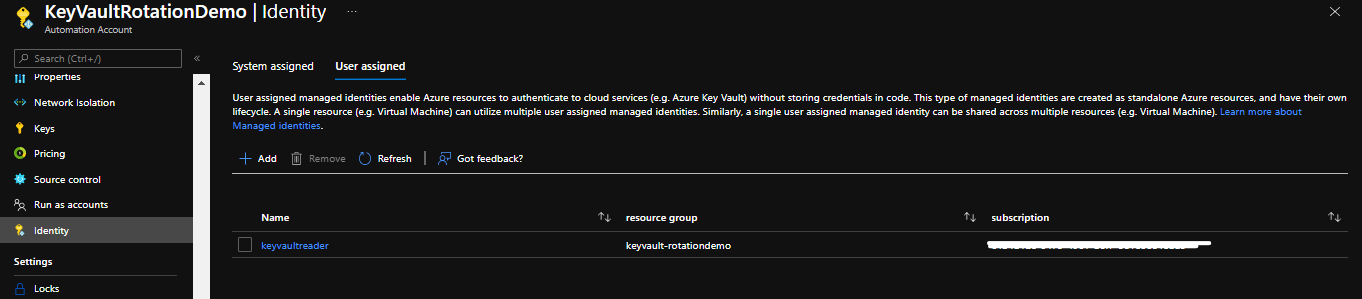
Add MI to Automation Account
This is an important step. Only assigning access to MI doesn’t help. You’ve got to let automation account know that it should use this MI from now on. You can do this by going to the Automation account blade and find the Identity section from left-hand options column. There you need to switch to User-Assigned tab and the add it.
 )
)
Update your PowerShell Runbooks to use MI
Now this is the crucial part. You must have been using Run-As-Account to authenticate all your requests originating from the runbook to Azure resources. And that involves adding a bunch of code to retrieve the Run-As-Account Service principal’s properties and then call Connect-AzAccount using those properties. The block looks something like this -
try
{
    # Get the connection "AzureRunAsConnection "
    $servicePrincipalConnection = Get-AutomationConnection -Name $connectionName
    "Logging in to Azure..."
    Connect-AzAccount `
        -ServicePrincipal `
        -TenantId $servicePrincipalConnection.TenantId `
        -ApplicationId $servicePrincipalConnection.ApplicationId `
        -CertificateThumbprint $servicePrincipalConnection.CertificateThumbprint
}
catch {
    if (!$servicePrincipalConnection)
    {
        $ErrorMessage = "Connection $connectionName not found."
        throw $ErrorMessage
    } else{
        Write-Error -Message $_.Exception
        throw $_.Exception
    }
}
With MI, you can remove this block and simply put three lines of code (1 out of which optional) to make your runbook work again.
For System-Assigned Identity
# Ensures you do not inherit an AzContext in your runbook
Disable-AzContextAutosave -Scope Process

# Connect to Azure with system-assigned managed identity
$AzureContext = (Connect-AzAccount -Identity).context

# set and store context
$AzureContext = Set-AzContext -SubscriptionName $AzureContext.Subscription -DefaultProfile $AzureContext
For User-Assigned Identity
# Ensures you do not inherit an AzContext in your runbook
Disable-AzContextAutosave -Scope Process
# Connect to Azure with user-assigned managed identity
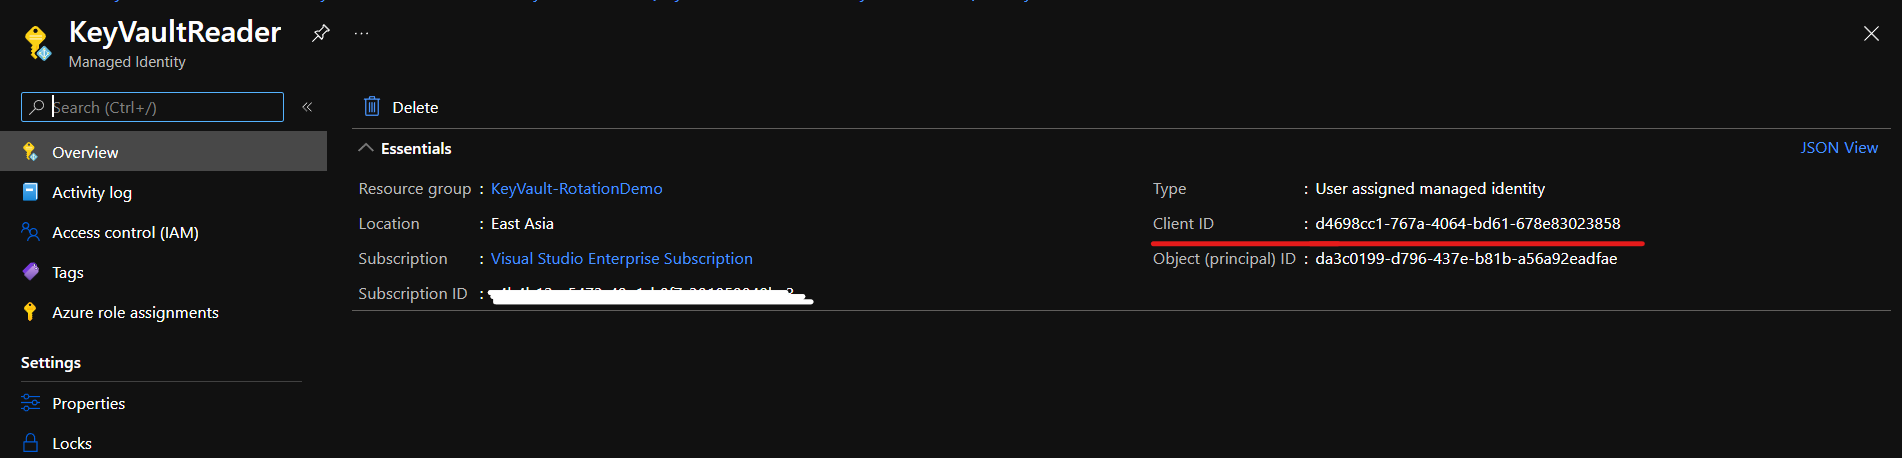
$AzureContext = (Connect-AzAccount -Identity -AccountId <user-assigned-identity-ClientId>).context
# set and store context
$AzureContext = Set-AzContext -SubscriptionName $AzureContext.Subscription -DefaultProfile $AzureContext
You can get user-assigned-identity-clientId from User-Assigned MI resource overview pane
Once you provide all these details, you will be able to run your runbooks without any extra modifications.You now have your runbooks successfully upgraded and also removed the extra tasks from your plate to manage the Run-As-Account Service principals. Hope you found this helpful. Cheers!